
로딩 중이에요... 🐣
Django(todoList) 6 이미지필드추가 | ✅ 저자: 이유정(박사)
[feat] django (Day 7)
-  pagination
-  CSS styling for pagination
config > settings.py
REST_FRAMEWORK = {
	# 기본권한 설정: 누구나 API에 접근 가능(개발시 사용)
    "DEFAULT_PERMISSION_CLASSES": [
        "rest_framework.permissions.AllowAny",
    ],
    # 기본 페이지네이션 설정
    "DEFAULT_PAGINATION_CLASS": "todo.pagination.CustomPageNumberPagination",
    "PAGE_SIZE": 10,

    # API응답형식
    "DEFAULT_RENDERER_CLASSES": [
        "rest_framework.renderers.JSONRenderer",
        "rest_framework.renderers.BrowsableAPIRenderer",
    ],
}

TIME_ZONE = 'Asia/Seoul' # 한국시간으로 변경
"JSONRenderer" → JSON 응답
"BrowsableAPIRenderer" → 웹브라우저에서 DRF 테스트 화면 보기 가능
todo > pagination.py
from rest_framework.pagination import PageNumberPagination
from rest_framework.response import Response
from collections import OrderedDict
from django.conf import settings

class CustomPageNumberPagination(PageNumberPagination):
    default_page_size = settings.REST_FRAMEWORK.get("PAGE_SIZE", 10)
    def paginate_queryset(self, queryset, request, view=None):
        page_size = request.query_params.get("page_size", self.default_page_size)

        if page_size == "all":
            self.page_size = len(queryset)
        else:
            try:
                self.page_size = int(page_size)
            except ValueError:
                self.page_size = self.default_page_size

        return super().paginate_queryset(queryset, request, view)

    def get_paginated_response(self, data):
        return Response(
            OrderedDict([
                ("data", data),
                ("page_size", len(data)),
                ("total_count", self.page.paginator.count),
                ("page_count", self.page.paginator.num_pages),
                ("current_page", self.page.number),
                ("next", self.get_next_link()),
                ("previous", self.get_previous_link()),
            ])
        )
의사코드
클래스 CustomPageNumberPagination:
    PageNumberPagination을 상속받는다

    설정: 기본 페이지 크기(default_page_size)는 settings에서 불러온다
           (없으면 기본값 10)

    메서드: paginate_queryset(queryset, request, view)
        - 클라이언트가 요청한 페이지 크기(page_size)를 쿼리에서 가져온다

        - 만약 page_size가 "all"이면:
            - 전체 queryset 길이만큼 데이터를 한 번에 보여주도록 설정
        - 그렇지 않으면:
            - page_size를 정수로 변환해서 사용
            - 변환 실패 시 default_page_size 사용
        - DRF 기본 paginate_queryset() 기능을 실행한다

    메서드: get_paginated_response(data)
        - 데이터를 다음과 같은 구조로 감싸서 응답한다:
            {
              "data": 실제 데이터 목록,
              "page_size": 이번 응답에서 몇 개 보냈는지,
              "total_count": 전체 데이터 개수,
              "page_count": 전체 페이지 수,
              "current_page": 현재 페이지 번호,
              "next": 다음 페이지 링크,
              "previous": 이전 페이지 링크
            }
Django REST Framework & URL 이름 설정(꼭 설명)
| 구분 | 키워드 | 역할 | 예시 |
|---|---|---|---|
config/urls.py |
namespace= |
앱 전체의 URL 이름 공간을 구분 | include("todo.urls", namespace="todo") |
app/urls.py |
name= |
단일 URL에 이름을 부여 | path("create/", views.create, name="todo-create") |
| DRF Router | basename= |
ViewSet에서 생성되는 URL name의 prefix | router.register("todos", TodoViewSet, basename="todo") |
페이지네이션 마무리 list.html 수정 데이터를 많이 채우기 settings.py에서 pagination 숫자를 조절하기
이미지삽입
pip install Pillow
config/settings.py
MEDIA_URL = '/media/'
MEDIA_ROOT = os.path.join(BASE_DIR, 'media')
todo/models.py (이미지 필드 추가)
# 이미지 필드 추가
    image = models.ImageField(upload_to='todo_images/', blank=True, null=True)
todo > models.py 추가
from django.utils import timezone

# 기본 동작 보완: complete 값에 따라 completed_at을 자동으로 처리
def save(self, *args, **kwargs):
	if self.complete and self.completed_at is None:
		self.completed_at = timezone.now()
	if not self.complete and self.completed_at is not None:
		self.completed_at = None
	super().save(*args, **kwargs)
timezone.now() 함수는 장고 설정(settings.py)에서 지정한 시간대(timezone)로 기준으로 반환해 줍니다.
터미널에 추가
python manage.py makemigrations
python manage.py migrate
todo/api_views.py (생성하기에 추가)
from rest_framework.parsers import MultiPartParser, FormParser
# 멀티 파트 파서(파싱), 폼 파서(파싱)

# 생성하기
class TodoCreateAPI(APIView):
    parser_classes = [MultiPartParser, FormParser]
MultiPartParser 이미지나 파일을 포함한 폼 데이터를 이해함 (사용자가 이미지 첨부 시)
FormParser 텍스트만 포함된 폼 데이터를 이해함 (일반 로그인 폼, 댓글 등)
todo/serializers.py
fields = "__all__" # 필드가 all로 되어있지 않으면 필드에 image추가
static/js/axiosInstance.js
const axiosInstance = axios.create({
    baseURL: '/',
    headers: {
        "X-CSRFToken": getCookie("csrftoken"),
        // 'Content-Type': 'application/json', 이거 삭제
        "Content-Type": "multipart/form-data" // 이거 추가
    }
});
templates/todo/create.html (함수 전체 수정)
// --- 4. 생성 버튼 클릭 시 실행되는 핸들러 --
function gatherFormData() {
  const formData = new FormData(); // 이미지 전송 가능한 폼 객체

  // 숫자 처리
  let expVal = document.getElementById('exp').value;
  if (expVal === '') expVal = 0;

  // 날짜 처리
  const completedAtInput = document.getElementById('completed_at').value;
  const completedAt = completedAtInput ? new Date(completedAtInput).toISOString() : null;

  // 텍스트 필드 추가
  formData.append("name", document.getElementById('name').value);
  formData.append("description", document.getElementById('description').value);
  formData.append("complete", document.getElementById('complete').checked);
  formData.append("completed_at", completedAt);
  formData.append("exp", Number(expVal));

  // 이미지 파일 추가
  const imageInput = document.getElementById('image');
  if (imageInput && imageInput.files.length > 0) {
    formData.append("image", imageInput.files[0]);
  }

  return formData;
}
이미지(파일)를 함께 서버로 보내기 위해서 수정해야 합니다. 원래 사용하던 방식은 이렇게 생긴 일반 JS 객체입니다
return {
  name: "...",
  description: "...",
  image: document.getElementById('image').files[0]
};
하지만 문제는:
- axios가 이 객체를 JSON.stringify()로 바꿔서 보냅니다 (스트링어파이)
.stringify()는 자바스크립트에서 객체(Object)를 문자열(String)로 바꿔주는 함수입니다.- → JSON은 텍스트만 담을 수 있어서 이미지 파일은 깨집니다
- → 서버는
request.FILES에서 아무 것도 못 받음 → 400 오류 발생
list.html (수정 이미지 추가)
<p><strong>Experience Points:</strong> ${todo.exp}</p>
<p><strong>image:</strong><br> ${todo.image ? `<img src="${todo.image}" alt="${todo.name}" width="150">` : ''}</p>
<button class="completeBtn">완료</button>
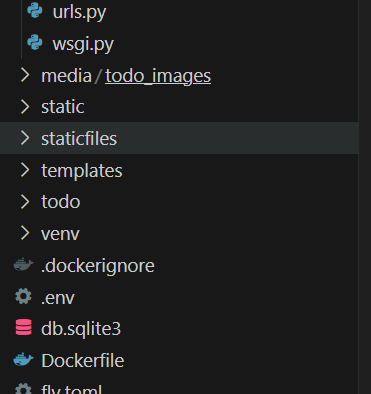 위의 이미지와 같이 폴더생성
<div>
  <label for="image">Image:</label>
  <input type="file" name="image" id="image">
</div>
이미지 필드 추가
config/urls.py
from django.conf import settings
from django.conf.urls.static import static
...
]+ static(settings.MEDIA_URL, document_root=settings.MEDIA_ROOT)
개발환경에서 업로드된 미디어 파일(media files) 을 브라우저에서 접근 가능하게 하기 위해 설정해주는 코드입니다. 개발 서버에서는 Django가 미디어 파일을 자동으로 서빙하지 않기 때문입니다.
즉, 사용자가 업로드한 이미지가 /media/myphoto.jpg에 저장되어 있다고 해도, 아무 설정이 없으면 브라우저에서 그 URL을 열었을 때 404 오류가 납니다.
인증 권한 설정
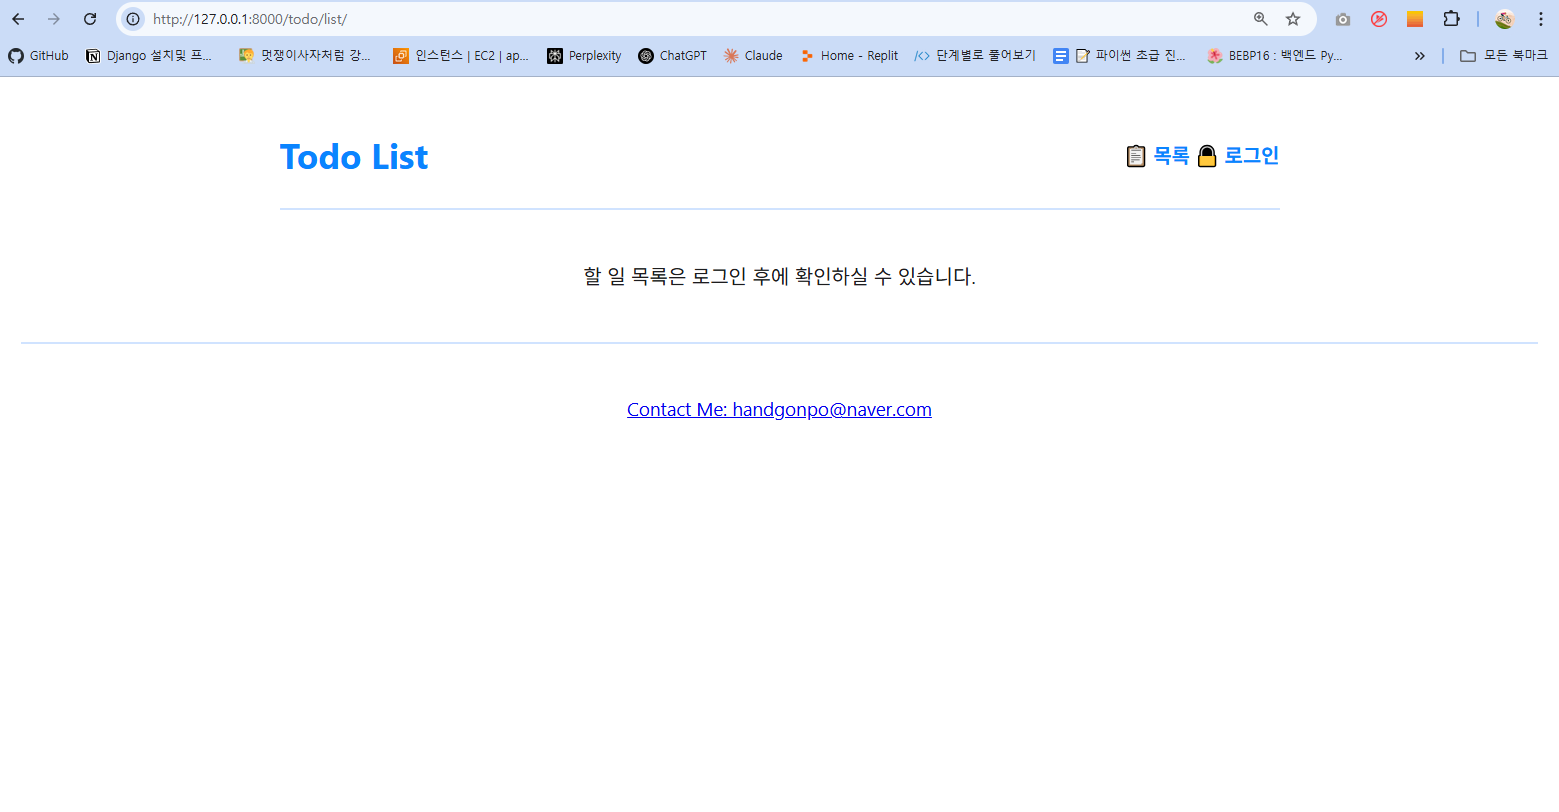 위처럼 수정하려면 list를 조건문으로 수정하기
{% if user.is_authenticated %}
    <div class="todocontainer"></div>
    <div class="pagination" ></div>
    <div class="list-btn"><button class="todoCreate" id="createBtn">Todo 등록하기</button></div>
{% else %}
    <div style="max-width: 600px; margin: 40px auto; text-align: center;">
        <p>할 일 목록은 로그인 후에 확인하실 수 있습니다.</p>
    </div>
{% endif %}
todo/api_views.py
# 인증 방식 설정: Django 로그인 세션 사용
authentication_classes = [SessionAuthentication]
# 권한 설정: 로그인된 사용자만 이 API 사용 가능
permission_classes = [IsAuthenticated]
config/setting.py
REST_FRAMEWORK = {
    # 인증 클래스: 사용자의 로그인 여부를 판단하는 방법 지정
    # SessionAuthentication → Django의 로그인 세션 기반
    # JWTAuthentication → 토큰 기반 인증 (선택사항, 사용 시 추가 설치 필요)
    "DEFAULT_AUTHENTICATION_CLASSES": [
        "rest_framework.authentication.SessionAuthentication",
 # "rest_framework_simplejwt.authentication.JWTAuthentication",
 # JWT 사용 시 주석 해제
    ],

    # 권한 클래스: 인증된 사용자만 접근 가능하도록 기본 설정
    "DEFAULT_PERMISSION_CLASSES": [
        "rest_framework.permissions.IsAuthenticated",
        # 로그인된 사용자만 접근 허용
        # "rest_framework.permissions.AllowAny",
        # 전체 공개로 바꾸고 싶을 때 사용
    ],
보안설정
# django-environ 설치하기
pip install django-environ
settings.py
import os, environ # 환경변수 추가

# 가장 윗줄에 있어야 에러가 안남
BASE_DIR = Path(__file__).resolve().parent.parent

# 보안 향상, 코드 재사용, 환경 구분 가능
env = environ.Env(
	DEBUG=(bool, False)
)

#
environ.Env.read_env(os.path.join(BASE_DIR, '.env'))

# SECURITY를 .env로 이동하여 보호
SECRET_KEY = env('DJANGO_SECRET_KEY')
.env 파일을 manage.py경로에 생성
DJANGO_SECRET_KEY="your-very-secret-key-here"
app 분리관리
CUSTOM_APPS = [
    'todo',
]

THIRD_PARTY_APPS = [
    'django.contrib.admin',
    'django.contrib.auth',
    'django.contrib.contenttypes',
    'django.contrib.sessions',
    'django.contrib.messages',
    'django.contrib.staticfiles',
    'rest_framework',
]

INSTALLED_APPS = CUSTOM_APPS + THIRD_PARTY_APPS
스웨거 추가
pip install mysqlclient==2.2.1 Pillow==10.3.0 markdown==3.5.1 django-filter==23.5 drf-spectacular==0.27.0

pip install drf-spectacular
config/settings.py
# OpenAPI 스키마 클래스: drf-spectacular을 통한 Swagger 문서 자동 생성
"DEFAULT_SCHEMA_CLASS": "drf_spectacular.openapi.AutoSchema",
config/urls.py
 from drf_spectacular.views import SpectacularAPIView, SpectacularRedocView, SpectacularSwaggerView
from django.views.generic import TemplateView

# OpenAPI 3.0 schema
path("api/schema/", SpectacularAPIView.as_view(), name="schema"),
path("api/schema/swagger-ui/", SpectacularSwaggerView.as_view(url_name="schema"), name="swagger-ui"),
path("api/schema/redoc/", SpectacularRedocView.as_view(url_name="schema"), name="redoc"),
http://127.0.0.1:8800/api/schema/swagger-ui/
버튼 수정: css를 위해
<div class="list-btn"><button class="todoCreate" id="createBtn">Todo 등록하기</button></div>
static > css > styles.css
/* 기존 내용 유지 */
.todo-item.completed {
    text-decoration: line-through;
}

/* reset */
* {
    margin: 0;
    padding: 0;
    box-sizing: border-box;
}

/* body 스타일 */
body {
    background-color: #ffffff;
    color: #1c1c1e;
    font-family: 'Segoe UI', Tahoma, Geneva, Verdana, sans-serif;
    line-height: 1.6;
    padding: 20px;
}

/* 공통 박스 */
.container, .todocontainer {
    max-width: 800px;
    margin: 40px auto;
    padding: 30px;
    background-color: #ffffff;
    border-radius: 12px;
    box-shadow: 0 0 15px rgba(0, 122, 255, 0.1);
}

/* 헤더 스타일 강화 */
.header {
    max-width: 800px;
    margin: 0 auto 20px auto;
    padding: 20px 0;
    border-bottom: 2px solid #d0e3ff;
    display: flex;
    justify-content: space-between;
    align-items: center;
}

.header h1 {
    font-size: 28px;
    color: #0a84ff;
    margin: 0;
}

.header a,
.header button {
    font-weight: bold;
    color: #0a84ff;
    text-decoration: none;
    background: none;
    border: none;
    cursor: pointer;
    font-size: 16px;
}

/* input 스타일 */
input[type="text"],
input[type="number"],
textarea {
    width: 100%;
    padding: 12px;
    border-radius: 8px;
    border: 1px solid #ccc;
    background-color: #fff;
    color: #1c1c1e;
    margin-bottom: 20px;
    font-size: 16px;
}

/* checkbox */
input[type="checkbox"] {
    transform: scale(1.3);
    margin-top: 10px;
}

/* 공통 버튼 */
button {
    background-color: #0a84ff;
    color: white;
    border: none;
    border-radius: 8px;
    padding: 12px 24px;
    font-weight: bold;
    font-size: 16px;
    cursor: pointer;
    transition: background-color 0.2s ease-in-out;
    margin-top: 10px;
}

button:hover {
    background-color: #0066cc;
}

/* todo 아이템 */
.todo-item {
    background-color: #e6f0ff;
    border-radius: 10px;
    padding: 15px 20px;
    margin: 10px auto 15px auto;
    cursor: pointer;
    transition: background-color 0.2s ease-in-out;
    max-width: 800px;
    border: 1px solid #bcdcff;
}

.todo-item:hover {
    background-color: #d0e8ff;
}

/* 등록 버튼 왼쪽 정렬 */
.list-btn{
    max-width: 800px;
    margin: 40px auto;
}

.todoCreate {
    margin: 20px auto 20px 0;
    background-color: #007aff;
    color: white;
}

.todoCreate:hover {
    background-color: #005bb5;
}

/* 페이지네이션 */
.pagination {
    display: flex;
    justify-content: center;
    margin: 20px 0;
}

.pagination button {
    background-color: #0a84ff;
    color: white;
    border: none;
    margin: 0 5px;
    padding: 8px 16px;
    border-radius: 6px;
    font-weight: bold;
    cursor: pointer;
}

.pagination button.active {
    background-color: #005bb5;
}

.pagination button:disabled {
    background-color: #ccc;
    cursor: not-allowed;
}

/* 푸터 스타일 강조 */
.footer {
    text-align: center;
    padding-top: 40px;
    margin-top: 40px;
    border-top: 2px solid #d0e3ff;
    color: #555;
    font-size: 15px;
}
나중에
SQLite → PostgreSQL 전환 절차
settings.py에서 데이터베이스 설정 변경
# BEFORE (SQLite)
DATABASES = {
    'default': {
        'ENGINE': 'django.db.backends.sqlite3',
        'NAME': BASE_DIR / 'db.sqlite3',
    }
}

# AFTER (PostgreSQL)
DATABASES = {
    'default': {
        'ENGINE': 'django.db.backends.postgresql',
        'NAME': 'todo_db',        # 사용할 DB 이름
        'USER': 'postgres',       # DB 사용자
        'PASSWORD': 'yourpassword',
        'HOST': 'localhost',      # 또는 RDS 주소, Docker 컨테이너 이름 등
        'PORT': '5432',           # PostgreSQL 기본 포트
    }
}
PostgreSQL 설치 및 DB 생성
# PostgreSQL 설치 후
createdb todo_db  # 이름은 settings.py의 NAME과 일치시켜야 함
마이그레이션 재실행
python manage.py migrate
(선택) 기존 SQLite 데이터 이관
python manage.py dumpdata > data.json
PostgreSQL 설정 후:
python manage.py loaddata data.json